Table of Contents
Hey there! If you’re in the world of manufacturing, you’ve probably heard the term “continuous improvement” quite a bit. But what does it really mean? Simply put, it’s all about constantly looking for ways to make processes better – faster, more efficient, and higher quality. In this article, we’re going to dive into some of the best tools and methods you can use to keep improving your manufacturing processes. Whether you’re just starting out or looking to fine-tune your operations, there’s something here for everyone. So, let’s get started on this journey to make things better, step by step!
What are Continuous Improvement Tools?
Alright, let’s tackle this question head-on. Continuous improvement tools are basically the methods and techniques used to help you make ongoing improvements in your manufacturing processes. Think of them like a toolbox filled with different gadgets designed to help you solve problems, streamline operations, and boost overall efficiency.
These tools come in various forms, but they all share a common goal: making your processes better, whether that means reducing waste, cutting down on errors, or saving time and money. Continuous improvement isn’t a one-time thing; it’s a mindset and approach that encourages constant evaluation and enhancement.
What’s cool about these tools is that they can be used in different combinations to suit your specific needs. Whether you’re dealing with a small snag in your process or looking to overhaul an entire operation, there’s a tool out there to help you get the job done. So, let’s dive deeper into the benefits and some popular tools you might find useful on your journey to improvement!
Benefits of Continuous Improvement Tools
Now that we know what continuous improvement tools are, let’s talk about why they’re so valuable. Implementing these tools brings a range of benefits that can transform your manufacturing processes and your overall business performance. Here are some of the key advantages:
Enhanced Efficiency and Productivity
First up, continuous improvement tools help streamline operations, making processes more efficient. When you identify and eliminate bottlenecks, redundancies, and waste, your team can accomplish more in less time. This boost in efficiency can lead to significant cost savings and higher output, which is always a win in the manufacturing world.
Improved Quality
Quality is king! By using continuous improvement tools, you can consistently refine and enhance the quality of your products. Tools like Root Cause Analysis and Poka-Yoke help identify and eliminate defects, ensuring that what you produce meets or even exceeds customer expectations. High-quality products can lead to fewer returns and higher customer satisfaction.
Increased Customer Satisfaction
Speaking of customers, continuous improvement tools can significantly enhance their experience. When your products are top-notch and your service is reliable, customers are more likely to stick around and recommend your business. Happy customers are the backbone of any successful operation, and continuous improvement tools help keep them that way.
Fostering Innovation
Lastly, these tools encourage a culture of innovation. When your team is always on the lookout for better ways to do things, creativity and new ideas flourish. This mindset not only helps solve current problems but also prepares your business to handle future challenges more effectively.
In short, continuous improvement tools are about creating a better, more efficient, and innovative workplace. With these benefits in mind, let’s move on to explore some specific tools and methods that can make a big difference in your operations.
Popular Continuous Improvement Tools and Methods
Alright, now that we know the benefits, let’s get into the nuts and bolts of continuous improvement tools and methods. There are many different tools out there, each with its unique approach to solving problems and enhancing processes. Let’s take a look at some of the most popular ones you’ll come across:
1. PDCA (Plan, Do, Check, Act)
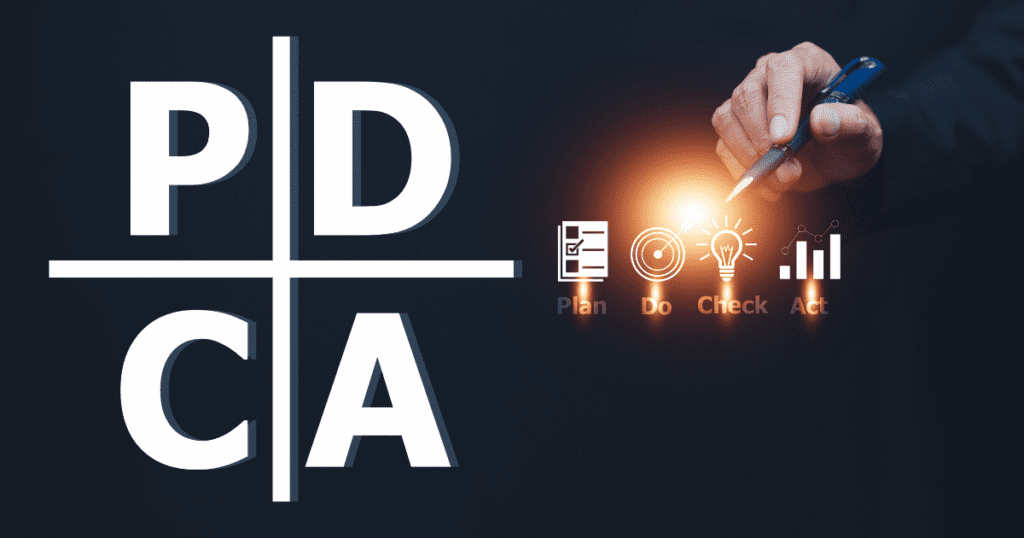
PDCA is one of the cornerstone methodologies in the world of continuous improvement. It’s a simple yet powerful four-step cycle that can be repeated over and over to drive constant enhancements. Let’s break down each step:
Plan
In this first step, you identify a problem or an area where improvement is needed. Then, you gather data, analyze the situation, and develop a plan to address the issue. This stage is all about preparation – setting clear objectives, outlining the steps you’ll take, and determining the resources you’ll need.
Do
Next, you implement the plan on a small scale. This is where the rubber meets the road. You put your plan into action, carrying out the changes you’ve designed. It’s crucial to document everything during this stage so you can track the implementation process and gather data on its effectiveness.
Check
After implementing the plan, it’s time to evaluate the results. Compare the outcomes with your initial objectives to see if the changes made the desired impact. This step involves analyzing the data you collected during the “Do” phase to check for any variations and understanding whether the improvement has worked or if further tweaks are needed.
Act
Based on the results from the “Check” phase, you decide what to do next. If the plan was successful, you can standardize the changes and implement them on a larger scale. If it wasn’t as effective as hoped, you’ll need to make adjustments and go through the cycle again. The “Act” phase is crucial for ensuring continuous and sustained improvement.
Plan, Do, Check, Act (PDCA) Certification Course
By constantly cycling through these steps, PDCA helps teams and organizations adapt, learn, and grow. It encourages a proactive approach to problem-solving and process optimization, making it a go-to methodology for many businesses striving for excellence.
2. Gemba Walks
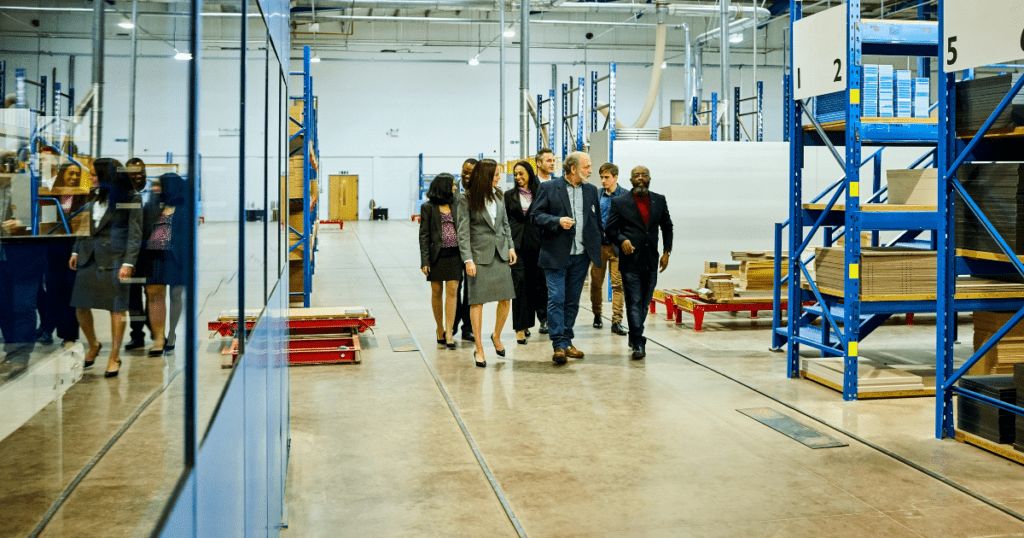
Gemba Walks are a fantastic way to gain real-world insights and foster continuous improvement directly on the shop floor. “Gemba” is a Japanese term that means “the real place.” In the context of manufacturing and business, it represents the location where value is created.
What Are Gemba Walks?
Gemba Walks involve managers or leaders going to the place where work happens and observing the processes firsthand. It’s not about sitting in a conference room and looking at charts and reports; it’s about getting up close and personal with the actual workflow. The primary goal is to understand the work process, identify opportunities for improvement, and engage directly with employees.
The Process of a Gemba Walk
- Preparation:
Before embarking on a Gemba Walk, it’s essential to have a clear objective. What do you want to learn or achieve? It could be understanding a specific process, identifying inefficiencies, or simply connecting with the team. - Observation:
During the walk, observe the work being done without interrupting or making immediate judgments. Pay attention to how processes are carried out, how materials and information flow, and any visible bottlenecks or waste. - Engagement:
Engage with the employees performing the tasks. Ask open-ended questions to understand their perspectives. Questions like, “What challenges do you face in this process?” or “Do you have any suggestions for improvement?” can yield valuable insights. - Documentation:
Take notes on your observations and the feedback from employees. Photographs and diagrams can also be useful to capture specific issues or setups. - Analysis and Reflection:
After the walk, analyze the information gathered. Reflect on what you saw and heard, and identify key areas where improvements can be made. - Action Plan:
Develop an action plan to address the identified issues. Involve the team in brainstorming solutions and implementing changes. It’s crucial to follow up regularly and track the progress of the improvements made.
Why Gemba Walks Matter
Gemba Walks create a direct line of communication between management and frontline employees. They help leaders see the reality of day-to-day operations, which can be quite different from what reports and metrics suggest. This firsthand experience is invaluable for making informed decisions and driving effective improvements.
Moreover, Gemba Walks demonstrates to employees that their insights and contributions are valued. This can significantly boost morale and engagement, creating a more collaborative and proactive work environment.
In essence, Gemba Walks are about getting to the heart of your operations, understanding challenges from the ground up, and making meaningful improvements that resonate throughout the organization.
3. Kanban
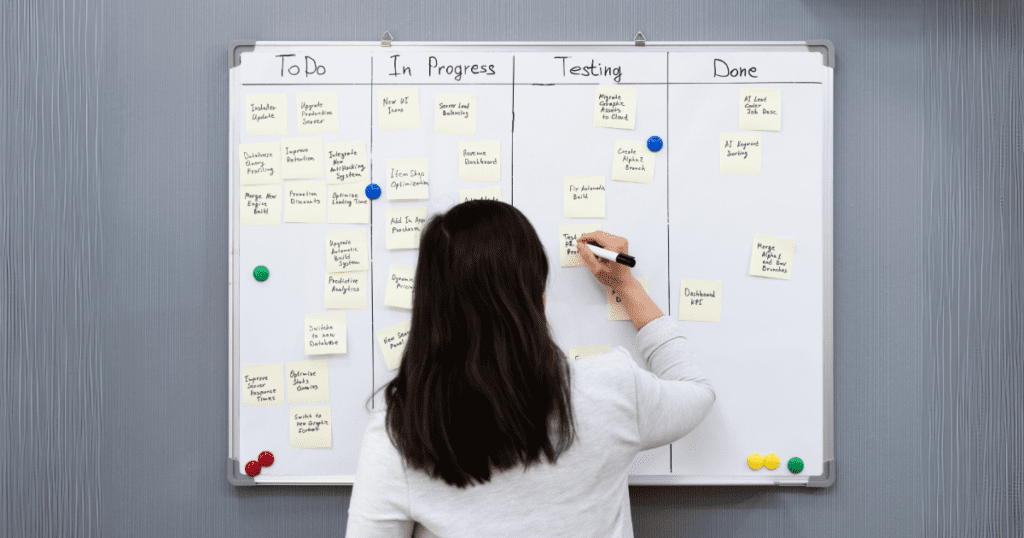
Kanban is a visual management tool that helps streamline workflows and improve process efficiency. Originating from the Japanese manufacturing industry, specifically Toyota, Kanban has grown in popularity across various sectors for its simplicity and effectiveness.
What is Kanban?
At its core, Kanban is a system that uses visual signals, usually cards and boards, to represent work items and track their progress through different stages of a process. The word “Kanban” itself means “visual signal” or “card” in Japanese. This system allows teams to visualize their work, limit work-in-progress (WIP), and optimize the flow of tasks from start to finish.
How Does Kanban Work?
- Creating a Kanban Board:
A Kanban board is typically divided into columns that represent different stages of the workflow. Common columns might include “To Do,” “In Progress,” and “Done.” Each task or work item is represented by a card that moves across the board as it progresses through these stages. - Adding Cards:
Tasks are added to the board as cards. Each card contains essential information about the task, such as the description, assignee, and due date. This visual representation makes it easy to see what needs to be done and who is working on what. - Setting Work-in-Progress (WIP) Limits:
One of the critical principles of Kanban is limiting the number of tasks that can be in certain stages of the workflow simultaneously. By setting WIP limits, you ensure that work doesn’t pile up and become overwhelming, which helps maintain a steady, manageable flow. - Managing the Flow:
As tasks are worked on, the cards move across the columns of the Kanban board. This visual movement makes it easy to track progress, identify bottlenecks, and address any issues that arise promptly. The goal is to keep tasks flowing smoothly from start to finish.
Why Use Kanban?
Kanban offers numerous benefits that make it a powerful tool for continuous improvement:
- Clarity and Transparency: Since the entire workflow is visualized, everyone on the team can see what tasks are being worked on, who is working on them, and what the current status is. This transparency fosters better collaboration and understanding.
- Improved Efficiency: By limiting WIP and focusing on one task at a time, teams can reduce multitasking and improve productivity. This focus helps tasks get completed faster and more efficiently.
- Flexibility: Kanban is highly adaptable and can be customized to fit any workflow, whether it’s in manufacturing, software development, or administration. You can easily adjust columns, WIP limits, and workflows to suit your specific needs.
- Continuous Improvement: Kanban encourages teams to regularly review and adapt their processes. By consistently monitoring and tweaking the workflow, teams can find new ways to improve and optimize their operations.
In summary, Kanban is a straightforward but powerful tool that helps visualize work, manage workflow, and drive continuous improvements. Its flexibility and focus on efficiency make it a valuable method for any team aiming to enhance their processes and deliver better results.
4. 5 Whys
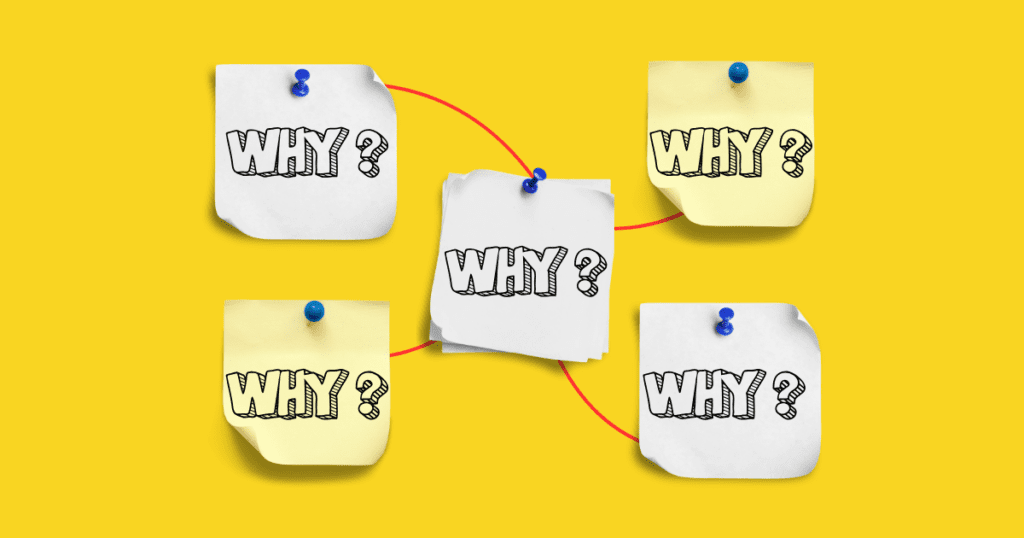
The 5 Whys technique is a straightforward yet powerful tool used in root cause analysis to delve deeper into the cause of a problem by simply asking “why?” five times—or as many times as necessary—to peel away the layers of symptoms. This method is designed to uncover the fundamental cause of an issue, ensuring that any solution addresses not just the symptoms but the root cause itself.
How to Use the 5 Whys
Here’s a step-by-step guide on how to effectively use the 5 Whys technique:
- Identify the Problem:
Start with a clear and concise problem statement. This helps everyone involved understand exactly what issue you’re trying to solve. - Ask “Why?”:
Ask why the problem happens. The answer to this question will help you identify the first layer of the issue. - Repeat the Question:
For each answer, ask “why?” again. Keep peeling back the layers of symptoms by repeatedly asking why. Typically, after about five iterations, you’ll arrive at the root cause of the problem. - Record Each Step:
Document each question and answer sequence clearly. This helps in reviewing the thought process and ensuring that no steps are overlooked. It also aids in communication and transparency with your team. - Address the Root Cause:
Once the root cause is identified, develop a solution that tackles it directly. Ensure that any corrective actions are robust enough to prevent recurrence of the issue.
Example of 5 Whys in Action
Let’s go through a simple example to illustrate the 5 Whys technique:
Problem Statement: A machine in a factory has stopped working.
- Why did the machine stop?
- The machine stopped because it overheated.
- Why did it overheat?
- It overheated because the cooling system failed.
- Why did the cooling system fail?
- It failed because it was clogged with debris.
- Why was it clogged with debris?
- It was clogged because the filter wasn’t regularly cleaned.
- Why wasn’t the filter regularly cleaned?
- The filter wasn’t cleaned due to a lack of a scheduled maintenance plan.
Root Cause: The lack of a scheduled maintenance plan led to the cooling system clogging, causing the machine to overheat and stop.
By getting to the root cause, the issue can be addressed effectively by implementing a regular maintenance schedule, rather than just cleaning the filter once and risking the same issue recurring.
Why Use the 5 Whys?
- Simplicity: The 5 Whys is easy to use and doesn’t require complex tools or extensive training. It’s simple enough to apply in real-time during problem-solving discussions.
- Focus: This method drives you to focus on the actual cause of a problem rather than just dealing with symptoms, leading to more effective and lasting solutions.
- Engagement: It encourages team engagement and open communication, fostering a collaborative environment for problem-solving.
- Cost-Effective: As a low-cost technique, it can be used frequently without the need for expensive resources, making it accessible for businesses of all sizes.
5 Whys Diagram Certification Course
In summary, the 5 Whys is a practical tool for anyone aiming to go beyond surface-level fixes and tackle the real causes of problems. It helps ensure that improvements are grounded in a solid understanding of the issues at hand, paving the way for more effective and sustainable solutions.
5. Root Cause Analysis
Root Cause Analysis (RCA) is a systematic process used to identify the underlying reasons for a problem or defect. Rather than addressing the immediate symptoms, RCA aims to pinpoint the fundamental cause, ensuring that the problem is truly resolved and prevented from recurring. This approach not only fixes the present issue but also leads to improved processes and systems in the long run.
Steps in Root Cause Analysis
Here’s a structured approach to conducting an effective Root Cause Analysis:
- Define the Problem:
Clearly define the problem you’re facing. Make sure to describe it in specific terms that everyone can understand. This includes identifying what went wrong, who was involved, and the impact on the process or system. - Gather Data:
Collect relevant data and evidence related to the problem. This could include process logs, defect reports, and feedback from employees. The more information you have, the better you can understand the context and scope of the issue. - Identify Possible Causes:
Brainstorm potential causes of the problem with your team. This is where methods like the 5 Whys or Fishbone Diagram (Ishikawa Diagram) come in handy. The goal is to list all possible sources of the issue. - Analyze the Causes:
Evaluate the potential causes to determine the root cause. This involves digging deeper into each possibility and using data to confirm or rule out various causes. Tools like flowcharts or cause-and-effect diagrams can help visualize the relationships between different factors. - Identify Root Cause(s):
After thorough analysis, pinpoint the root cause(s). This is the fundamental reason behind the problem, which, when addressed, can prevent the issue from occurring again. - Develop Corrective Actions:
Once the root cause is identified, develop appropriate corrective actions. These should be targeted at the root cause to ensure the problem is effectively addressed. Involve your team in brainstorming practical and sustainable solutions. - Implement Solutions:
Put the corrective actions into practice. Make sure to communicate clearly with your team about the changes being made and ensure they have the resources needed to implement the solutions effectively. - Monitor and Review:
After implementation, monitor the results to ensure the corrective actions are working. Track key performance indicators to measure the effectiveness and make adjustments if necessary. Reviewing the outcomes also provides valuable feedback for future improvements.
Benefits of Root Cause Analysis
- Permanent Solutions:
RCA focuses on finding long-term solutions rather than quick fixes. By addressing the root cause, you prevent the problem from recurring. - Improved Processes:
Understanding the root causes of problems can highlight weaknesses in your processes. Addressing these can lead to more robust and efficient workflows. - Cost Savings:
By eliminating recurring issues, RCA can save your organization time and money. Rather than repeatedly spending resources on temporary fixes, investing in RCA can lead to sustainable improvements. - Employee Engagement:
Involving employees in RCA fosters a problem-solving culture and improves morale. Employees feel valued and are more likely to contribute useful insights and suggestions.
Root Cause Analysis is a vital tool for any organization serious about continuous improvement. By focusing on the underlying causes of problems, you can implement effective, lasting solutions that enhance overall productivity and quality. Whether used alone or in combination with other continuous improvement tools, RCA is essential for driving meaningful and sustainable improvements in your processes and systems.
6. Toyota Kata Coaching
Toyota Kata Coaching is a practice that promotes continuous improvement and learning within an organization by using structured routines. Developed by Toyota, this method focuses on ingraining a scientific, systematic approach to problem-solving and process improvement into the daily habits of employees.
What is Toyota Kata Coaching?
At its core, Toyota Kata Coaching involves two key routines: the Improvement Kata and the Coaching Kata. Together, these routines help teams navigate uncertainty, solve problems, and continuously strive for better results.
- Improvement Kata: This routine focuses on setting challenging goals, understanding the current condition, defining the next target condition, and experimenting to overcome obstacles.
- Coaching Kata: This routine centers around the manager or coach who guides and mentors the employees, ensuring they follow the steps of the Improvement Kata and fostering a culture of continuous learning and improvement.
Steps Involved in Toyota Kata
- Understand the Direction:
- The first step is to understand the overarching vision or long-term goals of the organization. This helps align the efforts of all team members and ensures everyone is working towards the same objectives.
- Grasp the Current Condition:
- Before you can improve, you need a clear understanding of where you are now. This involves gathering data, observing current processes, and identifying problems or inefficiencies.
- Define the Next Target Condition:
- Break down the long-term vision into smaller, manageable target conditions. These should be specific, measurable goals that you aim to achieve in the short term, paving the way towards the broader objectives.
- Conduct Experiments/PDCA Cycles:
- Use the PDCA (Plan, Do, Check, Act) cycle to experiment and learn. Plan your experiments to achieve the target condition, execute them, check the results, and act based on what you learn. This cycle is repeated until the target condition is achieved.
Role of a Coach in Toyota Kata
A crucial part of Toyota Kata Coaching is the role of the coach, typically a manager or team leader, who guides the learners through the Improvement Kata. The coach’s main responsibilities include:
- Observation and Feedback:
Regularly observing the learner’s activities and providing constructive feedback. - Questioning Techniques:
Using a set of structured questions to help learners reflect on their progress, identify obstacles, and think critically about their next steps. - Support and Guidance:
Offering support, ensuring the learner stays on track, and encouraging a mindset of continuous improvement and experimentation.
Benefits of Toyota Kata Coaching
- Developing Problem-Solving Skills:
Employees learn to use a structured approach to tackle problems, which enhances their analytical and problem-solving skills. - Fostering a Learning Culture:
By emphasizing continuous learning and adaptation, Toyota Kata Coaching creates a culture where employees are always looking for ways to improve. - Alignment with Organizational Goals:
The structured approach ensures that everyone’s efforts are aligned with the organization’s long-term goals, fostering coherence and unity in the pursuit of excellence. - Resilience and Adaptability:
Regular practice of the Improvement and Coaching Kata helps teams build resilience and adaptability, making them better equipped to handle challenges and uncertainties.
Toyota Kata Coaching is more than just a problem-solving tool; it’s a way to nurture a dynamic learning environment where continuous improvement becomes second nature. By embedding structured routines and fostering a coaching culture, organizations can drive sustainable growth, innovation, and operational excellence. Whether you’re in manufacturing, services, or any other industry, adopting Toyota Kata Coaching can help you and your team achieve higher levels of performance and success.
7. 3M’s – Muda, Muri, and Mura
The concept of the 3Ms—Muda, Muri, and Mura—originates from the Toyota Production System and is crucial for lean manufacturing and continuous improvement. These Japanese terms refer to three types of inefficiencies that organizations should strive to eliminate to enhance productivity, efficiency, and quality.
Muda: Waste
Muda refers to any activity or process that consumes resources without adding value. Waste can be found in various forms and is often categorized into seven types:
- Defects: Products or services that do not meet quality standards, requiring rework or rejection.
- Overproduction: Producing more than what is needed, leading to excess inventory.
- Waiting: Idle time caused by delays or bottlenecks in the process.
- Non-Utilized Talent: Underutilizing employees’ skills and capabilities.
- Transportation: Unnecessary movement of materials or products.
- Inventory: Excess raw materials, work-in-progress, or finished goods.
- Motion: Unnecessary movements by people, such as reaching or walking.
Eliminating Muda involves identifying these wastes and implementing corrective actions to minimize or remove them.
Muri: Overburden
Muri means overburdening people or equipment, pushing them beyond their natural limits. Overburden can lead to:
- Employee Burnout: Overloading employees with excessive workloads or unrealistic deadlines, leading to stress, fatigue, and decreased productivity.
- Equipment Strain: Running machines at full capacity without adequate maintenance, resulting in breakdowns and reduced lifespan.
To eliminate Muri, it’s essential to balance workloads, ensure realistic expectations, and regularly maintain equipment. This helps create a more sustainable and efficient working environment.
Mura: Unevenness
Mura refers to irregularities or inconsistencies in processes, leading to fluctuations in production or quality. Examples of Mura include:
- Inconsistent Workloads: Some employees may have more work than they can handle, while others are underutilized.
- Fluctuating Production Levels: Variations in production rates that cause bottlenecks or idle time.
Eliminating Mura involves:
- Standardizing Processes: Implementing standard operating procedures to ensure consistency.
- Just-In-Time Production: Producing only what is needed, when it is needed, to match customer demand and minimize inventory.
Benefits of Eliminating the 3Ms
- Improved Efficiency: Removing waste, overburden, and unevenness streamlines processes, making operations more efficient.
- Enhanced Quality: Consistent and balanced processes lead to better quality products and services.
- Employee Satisfaction: Avoiding overburden and utilizing talents effectively can boost morale and job satisfaction.
- Cost Savings: Reducing waste and preventing equipment breakdowns can lead to significant cost savings.
The 3Ms—Muda, Muri, and Mura—are fundamental concepts for achieving lean manufacturing and continuous improvement. By systematically identifying and eliminating waste, overburden, and unevenness, organizations can create more efficient, resilient, and productive operations. Adopting these principles not only improves the bottom line but also enhances the working environment for employees, leading to sustainable growth and long-term success.
8. Kaizen
When it comes to continuous improvement, Kaizen is a philosophy that stands out. Originating from Japan, the term “Kaizen” translates to “change for better” or “continuous improvement.” It’s about making small, incremental changes to processes, aiming for constant progress and improvement. Unlike major overhauls, Kaizen focuses on day-to-day operations, promoting a mindset where employees at all levels work together proactively to achieve regular, incremental enhancements.
Core Principles of Kaizen
- Continuous Improvement:
- Kaizen is centred on ongoing changes that are incremental and frequently implemented. Rather than waiting for a problem to become massive, the idea is to fix it when it’s still small. This philosophy encourages employees to seek out opportunities for improvement every day.
- Employee Involvement:
- Kaizen isn’t just for managers or top executives; it involves everyone. Employees at all levels are encouraged to contribute suggestions and participate in improving their work environment and processes. This collective effort leads to more comprehensive and effective improvements.
- Small Changes:
- The focus on small changes allows for quick implementation and immediate feedback. This makes it easier to assess the impact and make further adjustments if needed.
- Teamwork:
- Problem-solving and implementation in Kaizen are usually collaborative efforts. Cross-functional teams work together to identify issues and develop solutions, ensuring that different perspectives are considered.
Steps in the Kaizen Process
- Identify Opportunities:
- Employees and teams regularly analyze their work processes to identify potential areas for improvement. This could be through observation, discussion, or formal analysis tools like root cause analysis.
- Plan the Change:
- Once an opportunity is identified, the next step is to plan the improvement. This involves setting clear objectives, designing the change, and outlining the steps needed to implement it.
- Implement the Change:
- With the plan in place, the improvement is implemented. This could range from adjusting a workstation layout to streamline workflow, to introducing a new protocol for quality checks.
- Review and Assess:
- After implementation, the change is reviewed to assess its effectiveness. Metrics are used to determine whether the improvement has had the desired impact.
- Standardize the Change:
- If the change is successful, it becomes the new standard work process. Documentation is updated, and employees are trained on the new procedure to ensure consistency.
- Repeat:
- Kaizen is an iterative process. Once one improvement is made, the cycle starts again. Continuous assessment and willingness to improve underpin the Kaizen approach.
Benefits of Kaizen
- Increased Efficiency:
By regularly addressing small inefficiencies, Kaizen helps streamline processes, making them faster and more efficient. - Enhanced Quality:
Continuous small improvements often lead to significant enhancements in product and service quality over time. - Employee Engagement:
Involving employees in the improvement process boosts their sense of ownership and morale. They feel valued and are more likely to contribute proactively. - Cost Reduction:
Incremental improvements can lead to significant cost savings by reducing waste, optimizing resources, and preventing major issues. - Adaptability:
Kaizen fosters a culture of adaptability and responsiveness, allowing organizations to quickly adjust and improve in response to changing circumstances.
Kaizen isn’t just a methodology; it’s a culture of continuous improvement that permeates every level of an organization. By focusing on small, consistent changes and involving all employees in the process, Kaizen helps companies achieve greater efficiency, quality, and employee satisfaction. It’s this relentless pursuit of better that drives sustainable growth and success, making Kaizen an essential pillar of continuous improvement. Whether you are in manufacturing, healthcare, software development, or any other field, adopting Kaizen can help your organization thrive in an ever-evolving environment.
9. Value Stream Mapping
Value Stream Mapping (VSM) is a powerful tool used to visualize, analyze, and improve the flow of materials and information required to bring a product or service to a customer. Originating from Lean manufacturing principles, this method enables organizations to identify areas of waste and opportunities for improvement, ensuring a more streamlined and efficient process from start to finish.
What is Value Stream Mapping?
Value Stream Mapping is a visual tool that maps out all the steps involved in the process of delivering a product or service. It highlights both the value-adding steps and the non-value-adding steps (waste) in the process. By providing a holistic view of the entire workflow, VSM helps teams understand how work currently flows and where delays, bottlenecks, and inefficiencies exist.
Steps to Conduct Value Stream Mapping
- Select the Product or Service:
- Choose a specific product or service to analyze. This should be something that is representative of your processes and will provide meaningful insights.
- Define the Scope:
- Determine the boundaries of your map. This is typically from the beginning of the process (e.g., raw material) to the end (finished product or service delivery).
- Map the Current State:
- Create a Current State Map that documents every step in the process as it currently exists. This includes all activities, the flow of materials and information, and any delays or queues. Use standard symbols and conventions to represent different types of activities and flows.
- Identify Waste:
- Analyze the Current State Map to identify non-value-adding activities (waste), such as excess inventory, unnecessary transportation, waiting times, and overproduction. Highlight these areas to prioritize improvement efforts.
- Design the Future State:
- Create a Future State Map that illustrates an improved process with reduced waste and enhanced efficiency. This map should represent how you want the process to look after implementing improvements, focusing on value-adding activities and streamlined workflows.
- Develop an Action Plan:
- Formulate a detailed action plan to transition from the Current State to the Future State. Assign responsibilities, set timelines, and define specific actions needed to implement the improvements.
- Implement and Monitor:
- Execute the action plan and monitor the process to ensure changes are effectively implemented. Use metrics and key performance indicators (KPIs) to track progress and measure the impact of the improvements.
Benefits of Value Stream Mapping
- Improved Visibility:
By mapping out the entire process, VSM provides a clear and comprehensive view of how work flows through your system. This visualization makes it easier to identify bottlenecks and inefficiencies. - Waste Reduction:
VSM highlights non-value-adding activities, helping you pinpoint exactly where waste occurs. This targeted approach allows for more effective waste elimination. - Enhanced Efficiency:
Streamlining the process to focus on value-adding steps leads to faster and more efficient workflows, reducing lead times and increasing overall productivity. - Better Communication:
A visual map is a powerful communication tool that helps align team members and stakeholders on the current process and proposed improvements. It facilitates better understanding and collaboration. - Continuous Improvement:
VSM is not a one-time activity. It fosters a mindset of continuous improvement, encouraging teams to regularly revisit and refine their processes for sustained excellence.
Value Stream Mapping is an essential tool for any organization seeking to enhance efficiency, eliminate waste, and improve overall process performance. By providing a detailed visual representation of workflows, VSM helps teams understand current processes, identify areas for improvement, and create more streamlined and effective future-state workflows. Whether you’re in manufacturing, healthcare, logistics, or any other industry, applying Value Stream Mapping can drive significant improvements in how you deliver value to your customers. In an environment where efficiency and quality are paramount, VSM stands out as a critical component of your continuous improvement toolkit.
10. A3

A3 is a structured problem-solving and continuous improvement approach that originated from Toyota. Named after the international paper size (A3, 11.7 x 16.5 inches) on which it is typically documented, this method simplifies complex problems, making them easier to solve and manage. The A3 process emphasizes clear communication, collaboration, and a systematic approach to problem-solving.
What is A3?
A3 is more than just a document; it’s a storyboard that guides the problem-solving process. It helps teams succinctly capture the essence of the problem, the analysis, the proposed solutions, and the results. By adhering to a structured format, A3 ensures that all critical aspects of problem-solving are addressed methodically.
Steps in A3 Problem-Solving
- Background:
- Purpose: Explain why the issue is important and provide context. This sets the stage for understanding the problem’s significance.
- Content: Briefly describe the situation, including relevant history and background information.
- Current State:
- Purpose: Clearly depict the current condition or problem. This helps in understanding what’s happening now and frames the issue at hand.
- Content: Use diagrams, charts, and bullet points to illustrate the current state of the process or system being analyzed.
- Problem Statement:
- Purpose: Define the problem in precise terms, making it clear and specific.
- Content: Articulate the gap between the current state and the desired state. Ensure it’s a problem worth solving.
- Root Cause Analysis:
- Purpose: Identify the fundamental cause(s) of the problem.
- Content: Use tools like the 5 Whys, Fishbone Diagram, or Pareto Analysis to uncover root causes. Document the analysis clearly.
- Target State:
- Purpose: Define what the improved state looks like.
- Content: Describe the desired outcomes and how they differ from the current state. Include measurable objectives.
- Countermeasures:
- Purpose: Propose solutions to address the problem.
- Content: Outline the actions needed to move from the current state to the target state. Include steps, responsible parties, and timelines for implementation.
- Implementation Plan:
- Purpose: Provide a detailed plan for executing the countermeasures.
- Content: Break down the countermeasures into actionable steps. Include a timeline, resources required, and responsibilities.
- Follow-Up:
- Purpose: Ensure the problem is resolved and improvements are sustained.
- Content: Document how the implementation will be monitored and evaluated. Include success metrics and a review schedule.
Benefits of Using A3
- Clarity and Focus:
A3 distills complex problems into a clear, concise, and focused format. This clarity facilitates better understanding and communication among team members and stakeholders. - Structured Approach:
The structured format ensures all critical aspects of problem-solving are addressed, leading to more thorough and effective problem resolution. - Engagement and Collaboration:
A3 promotes collaborative problem-solving. By involving team members in the process, it fosters a culture of shared responsibility and collective improvement. - Documentation and Knowledge Sharing:
Having a documented A3 report serves as a valuable reference for future problem-solving efforts. It captures the journey of identifying, analyzing, and solving a problem, which can be shared across the organization. - Alignment with Strategic Goals:
A3 ensures that problem-solving efforts are aligned with the organization’s strategic goals. It ties individual problems to broader objectives, ensuring that improvements contribute to overall business success.
The A3 method is an invaluable tool for any organization committed to systematic problem-solving and continuous improvement. It streamlines the process of understanding and addressing issues, ensuring that solutions are well thought out, effectively implemented, and sustainable. Whether you’re tackling small operational issues or significant strategic challenges, the A3 approach provides a disciplined framework that drives meaningful and lasting improvements. By integrating A3 into your problem-solving toolkit, you empower your team to achieve higher levels of efficiency, quality, and performance.
11. Poka-Yoke

Poka-Yoke is a Japanese term that translates to “mistake-proofing” or “error prevention.” Introduced by Shigeo Shingo, one of the pioneers of the Toyota Production System, Poka-Yoke aims to eliminate defects by preventing errors before they can cause problems. It’s a simple, yet powerful approach to ensuring quality and efficiency across various processes.
What is Poka-Yoke?
Poka-Yoke involves designing processes, tools, and systems in such a way that it becomes nearly impossible for mistakes to occur. By incorporating fail-safes and built-in checks, Poka-Yoke minimizes human error and enhances overall process reliability and quality.
Types of Poka-Yoke Devices
- Prevention Poka-Yoke:
- These devices are designed to prevent errors from occurring in the first place. Examples include design changes that make it impossible to assemble a product incorrectly or automated systems that alert operators before an error is made.
- Detection Poka-Yoke:
- These devices detect errors as soon as they occur, ensuring they are quickly corrected. This could include sensors that detect misalignment or gauges that verify dimensions before the next process step.
Steps to Implement Poka-Yoke
- Identify the Problem:
- Begin by identifying the areas where errors are most likely to occur. This could involve reviewing defect reports, observing processes, and gathering input from employees who are directly involved in the operations.
- Analyze the Root Cause:
- Use root cause analysis techniques, such as the 5 Whys or Fishbone Diagram, to understand why the errors are happening. This step is crucial for designing effective Poka-Yoke solutions.
- Develop the Poka-Yoke Solution:
- Design a mistake-proofing device or process change that prevents the identified errors. The solution should be simple, cost-effective, and easy to implement. Examples include jigs, fixtures, limit switches, or software prompts.
- Implement the Solution:
- Put the Poka-Yoke device or process change into practice. Ensure that employees are trained on the new system and understand its purpose and operation.
- Monitor and Adjust:
- After implementation, monitor the process to ensure the Poka-Yoke solution is effective. Collect data to see if the error rates have decreased and make adjustments as needed to refine the solution.
- Standardize the Improvement:
- Once the Poka-Yoke solution proves effective, standardize the new process. Update standard operating procedures and ensure that all relevant documentation reflects the changes.
Examples of Poka-Yoke
- Manufacturing:
- Assembly line fixtures that ensure parts can only be put together in the correct orientation.
- Colour-coded components that prevent mixing up different parts.
- Office Settings:
- Software checks that prevent data entry mistakes by validating input in real-time.
- Standardized forms that guide users to fill out information correctly.
- Healthcare:
- Medication dispensing systems that ensure the right dose and medication type.
- Barcoding systems that match patient information with treatments and medications.
Benefits of Poka-Yoke
- Error Reduction:
- By preventing mistakes before they happen or catching them immediately, Poka-Yoke dramatically reduces error rates.
- Quality Improvement:
- Ensuring processes are free from errors leads to higher quality products and services, enhancing customer satisfaction.
- Increased Efficiency:
- By minimizing downtime and rework caused by errors, Poka-Yoke contributes to more efficient operations.
- Employee Morale:
- Reducing mistakes and the stress associated with them can improve employee morale and job satisfaction.
- Cost Savings:
- Preventing defects before they reach critical stages saves resources, time, and money, contributing to a better bottom line.
Poka-Yoke is an essential element of continuous improvement and lean manufacturing. By systematically preventing errors and defects, organizations can enhance quality, streamline processes, and ensure more reliable outcomes. Whether in manufacturing, healthcare, or office environments, implementing Poka-Yoke can lead to significant improvements in efficiency and effectiveness. Embracing this method helps build a culture of excellence where every team member contributes to creating a mistake-free workplace.
12. Bottleneck Analysis

Bottleneck Analysis is a critical component of continuous improvement that focuses on identifying, analyzing, and addressing constraints within a process that slow down the overall production or service delivery. A bottleneck is any point in the workflow where work accumulates, slowing down the entire system. By effectively managing these bottlenecks, organizations can enhance efficiency, reduce lead times, and improve throughput.
What is Bottleneck Analysis?
Bottleneck Analysis involves systematically identifying stages in a process where delays occur, evaluating the impact of these delays, and implementing strategies to alleviate the constraint. This approach is grounded in the Theory of Constraints, which posits that every system has at least one bottleneck that limits its performance.
Steps in Bottleneck Analysis
- Identify the Bottleneck:
- The first step is to pinpoint the stage where work is backing up. This can usually be identified by observing where work in progress (WIP) tends to pile up, leading to delays and inefficiencies.
- Measure the Impact:
- Evaluate the extent to which the bottleneck is affecting the overall process performance. This includes measuring delays, calculating idle time, and understanding the impact on lead time and throughput.
- Analyze the Causes:
- Investigate why the bottleneck is occurring. Consider factors such as equipment capacity, manpower, process complexity, and workflow design. Tools like root cause analysis (RCA) and the Five Whys can be useful here.
- Develop Improvement Strategies:
- Formulate strategies to address the bottleneck. This might involve adding more resources, redistributing work, optimizing processes, or upgrading equipment. The solution should be tailored to the specific cause of the bottleneck.
- Implement Changes:
- Put the selected improvement strategies into action. Ensure proper training and communication with all involved team members to facilitate smooth implementation.
- Monitor and Evaluate:
- After implementing the changes, monitor the process to ensure the bottleneck has been effectively addressed. Collect data to evaluate the impact of the changes and make further adjustments if needed.
Tools for Bottleneck Analysis
To facilitate bottleneck analysis, several tools and techniques can be employed:
- Process Flowcharts:
- Visual diagrams that map out each step in the process, making it easier to spot where delays occur.
- Value Stream Mapping (VSM):
- VSM provides a detailed visualization of the flow of materials and information through the process, helping to identify bottlenecks and waste.
- Queueing Theory:
- Mathematical analysis of waiting lines, which can help predict where bottlenecks might occur and their impact on the process.
- Cycle Time Analysis:
- Measuring the time taken to complete each step in the process helps pinpoint stages with unusually high cycle times that may indicate a bottleneck.
Examples of Bottleneck Solutions
- Manufacturing:
- Upgrading machinery to increase capacity.
- Adding shifts or overtime to balance workload.
- Streamlining workflow to remove unnecessary steps.
- Service Industry:
- Hiring additional staff during peak times.
- Implementing self-service options for customers.
- Redesigning service processes to be more efficient.
- Healthcare:
- Improving scheduling systems to balance patient load.
- Implementing faster diagnostic equipment.
- Optimizing patient flow through layout changes in facilities.
Benefits of Bottleneck Analysis
- Increased Efficiency:
- By addressing bottlenecks, processes become more streamlined, leading to faster production or service delivery.
- Improved Throughput:
- Alleviating bottlenecks increases the amount of work that can be completed within a given timeframe.
- Cost Savings:
- Reducing delays and idle time lowers operational costs and increases profitability.
- Enhanced Quality:
- Smoother processes result in fewer disruptions, improving the consistency and quality of outputs.
- Better Employee Morale:
- Workflows without significant bottlenecks reduce stress on employees, leading to a more positive work environment.
Also read: The Theory of Constraints: From Understanding Principles to Implementing Techniques
Bottleneck Analysis is a vital practice for any organization seeking to improve efficiency and productivity. By systematically identifying and addressing process constraints, businesses can achieve smoother operations, reduced lead times, and enhanced output quality. Whether in manufacturing, services, or healthcare, effectively managing bottlenecks is key to unlocking higher performance and driving continuous improvement. Embracing Bottleneck Analysis enables organizations to maintain a competitive edge through optimized processes and reliable service delivery.
13. 5S Method
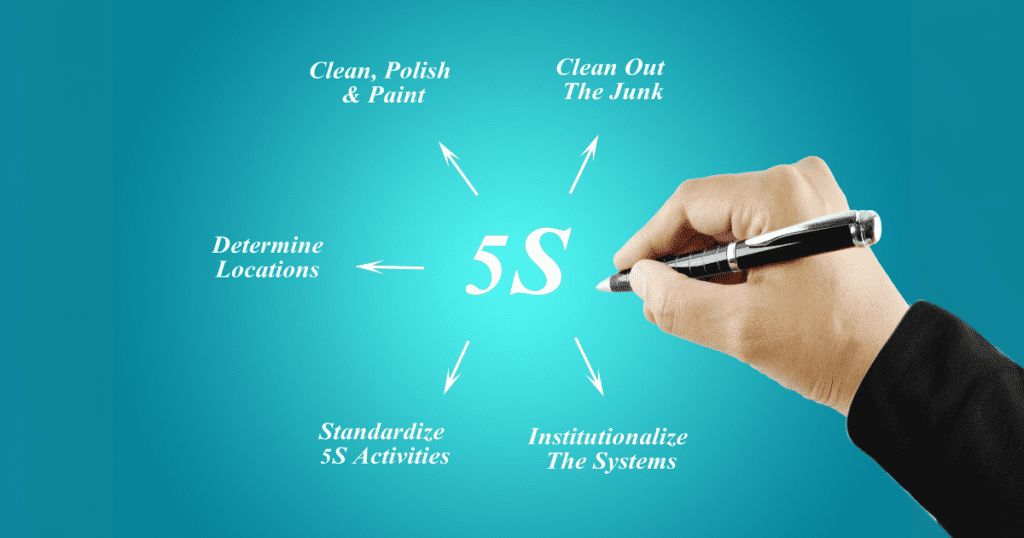
The 5S Method is a systematic approach to workplace organization and cleanliness, derived from five Japanese words that all start with the letter ‘S.’ It focuses on creating and maintaining an organized, efficient, and safe work environment. The method is widely used in various industries to boost productivity, improve safety, and reduce waste.
What is the 5S Method?
The 5S Method comprises five steps: Sort, Set in Order, Shine, Standardize, and Sustain. These steps are not just about cleaning or tidying up; they’re about setting up systems that promote a culture of continuous improvement and operational excellence.
Steps of the 5S Method
- Sort (Seiri):
- Purpose: Eliminate unnecessary items from the workplace.
- Content: Go through all tools, materials, and equipment and determine what is needed and what isn’t. Remove what is not required, reducing clutter and freeing up space.
- Set in Order (Seiton):
- Purpose: Organize the remaining items so they are easy to find and use.
- Content: Arrange tools and materials in a logical sequence based on their usage. Label locations and ensure everything has a designated place. This reduces time spent searching for items.
- Shine (Seiso):
- Purpose: Clean the workplace and keep it tidy.
- Content: Conduct regular cleaning and inspection to ensure the workplace is tidy and operational. This involves not just cleaning but also maintaining equipment in good working condition.
- Standardize (Seiketsu):
- Purpose: Implement standard procedures for the first three ‘S’ steps.
- Content: Develop standardized practices and schedules to maintain organization and cleanliness. This involves creating checklists, workflows, and guidelines that everyone follows consistently.
- Sustain (Shitsuke):
- Purpose: Ensure that the 5S processes are followed continuously.
- Content: Instill discipline among employees to maintain the 5S practices. Regular audits, training, and reviews help reinforce these habits, ensuring long-term adherence.
Benefits of the 5S Method
- Increased Efficiency:
- An organized workspace makes it easier to locate and retrieve items, reducing wasted time and effort.
- Enhanced Productivity:
- With fewer distractions and obstructions, employees can focus more on their work, leading to higher productivity levels.
- Improved Safety:
- A clean and well-organized environment reduces the risk of accidents and injuries, promoting a safer workplace.
- Higher Quality:
- Consistent and streamlined processes lead to fewer errors and better-quality outputs.
- Cost Savings:
- By reducing unnecessary inventory and preventing equipment breakdowns through regular maintenance, organizations can significantly cut costs.
- Employee Satisfaction:
- A tidy and efficient work environment can boost employee morale and job satisfaction, leading to a more motivated workforce.
Implementing the 5S Method
- Involve Everyone:
- Engage all employees in the 5S process to create a sense of ownership and commitment.
- Education and Training:
- Provide training on the principles and benefits of 5S to ensure everyone understands its importance and how to apply it.
- Dedicated Team:
- Form a team to lead the 5S implementation, conduct regular audits, and ensure continuous adherence.
- Visual Management:
- Use visual management tools such as labels, color coding, and signage to make it easy to maintain the 5S standards.
- Review and Improve:
- Regularly review the 5S practices and make improvements as necessary. Continuous feedback and adjustments are key to sustaining the benefits of 5S.
Examples of 5S in Action
- Manufacturing:
- Organizing tools and parts on shadow boards where each item has its designated place.
- Implementing a routine cleaning schedule for all equipment and workstations.
- Office:
- Creating designated areas for office supplies with clear labels.
- Setting up a routine for clearing and organizing desks at the end of each day.
- Healthcare:
- Storing medical supplies and equipment in specific locations for quick access.
- Ensuring that all medical devices are regularly cleaned and inspected.
The 5S Method is a fundamental practice for any organization aiming to enhance efficiency, safety, and productivity. By systematically sorting, organizing, cleaning, standardizing, and sustaining these practices, businesses can create a work environment that supports continuous improvement and operational excellence. Whether in manufacturing, offices, or healthcare, the principles of 5S can be adapted to suit various settings, driving significant improvements in the workplace. Embracing the 5S Method not only optimizes processes but also fosters a culture of discipline and pride among employees, leading to lasting success.
How to Implement Continuous Improvement Tools
Implementing continuous improvement tools effectively is crucial for fostering a culture of ongoing development and efficiency in any organization. Here’s a structured approach to guide you through the process:
Continuous Improvement Certification Course
Assess Current State
Before diving into any improvement initiatives, it’s essential to have a clear understanding of your current operations. This step involves:
- Gathering Data:
- Collect relevant data about your processes, workflows, performance metrics, and employee feedback. The goal is to have a comprehensive view of how things currently stand.
- Mapping Processes:
- Use tools like Value Stream Mapping (VSM) to create detailed visual representations of your workflows. This helps identify bottlenecks, waste, and areas for improvement.
- Identifying Issues:
- Analyze the collected data to pinpoint specific problems or inefficiencies. This could be anything from recurring defects, excessive waste, long lead times, to employee dissatisfaction.
- Benchmarking:
- Compare your current performance against industry standards or competitors’ benchmarks to understand where you stand and identify gaps.
Prioritize Areas of Improvement
Once you have a clear picture of your current state, the next step is to determine which areas to focus on first. This involves:
- Ranking Problems:
- List all identified issues and rank them based on factors such as impact on performance, cost implications, and frequency of occurrence.
- Setting Goals:
- Establish clear, measurable goals for what you want to achieve through your improvement efforts. This could include reducing cycle times, lowering defect rates, or improving employee engagement.
- Resource Allocation:
- Determine what resources (time, money, personnel) are needed for each improvement initiative and ensure you have the capacity to address them.
- Risk Assessment:
- Evaluate the potential risks associated with each improvement project and develop mitigation strategies to ensure successful implementation.
Select Appropriate Tools and Techniques
Different problems require different solutions. Choosing the right continuous improvement tools and techniques is vital for addressing specific issues effectively. Steps include:
- Tool Matching:
- Match the problems identified with the appropriate continuous improvement tools. For instance, use 5 Whys for root cause analysis, Poka-Yoke for error-proofing, or the 5S Method for workplace organization.
- Employee Involvement:
- Engage employees in the selection process. Their insights and frontline experience can help in choosing the most suitable tools and techniques.
- Pilot Testing:
- Before full-scale implementation, consider running a pilot test of the selected tools and techniques to assess their effectiveness and make necessary adjustments.
Create an Implementation Plan
A detailed implementation plan is crucial for ensuring that improvement initiatives are executed smoothly and successfully. This entails:
- Defining Actions:
- Break down each improvement goal into specific, actionable steps. Clearly outline what needs to be done, who will do it, and by when.
- Assigning Responsibilities:
- Allocate tasks to the appropriate team members or departments. Ensure each person understands their role and accountability in the improvement process.
- Setting Timelines:
- Establish realistic timelines for each step of the implementation. Include milestones and deadlines to keep the project on track.
- Providing Training:
- Offer training and resources to ensure that all employees understand the new processes, tools, and techniques. This helps in smooth adoption and minimizes resistance to change.
Monitor and Adapt
Continuous improvement is an ongoing process. Monitoring progress and being flexible to adapt as needed is vital for sustained success. Key actions include:
- Tracking Progress:
- Regularly monitor key performance indicators (KPIs) and metrics to assess the impact of the implemented changes. Use dashboards and reports to visualize progress.
- Gathering Feedback:
- Collect feedback from employees and stakeholders about the new processes and tools. Their input is valuable for identifying any issues or areas for further improvement.
- Reviewing and Adjusting:
- Periodically review the effectiveness of the implemented changes. Be willing to make adjustments or try new approaches if the desired results are not being achieved.
- Documenting Best Practices:
- Document successful strategies and best practices that emerge from the improvement initiatives. Share this knowledge across the organization to foster a culture of continuous learning.
Implementing continuous improvement tools requires a structured approach, starting with a thorough assessment of the current state, followed by prioritization, tool selection, planning, and continuous monitoring. By taking these steps, organizations can ensure that their improvement efforts are effective, sustainable, and contribute positively to their overall goals. Continuous improvement is not just about fixing problems; it’s about creating a proactive culture that strives for excellence in every aspect of the business.
Conclusion
Implementing continuous improvement tools and methodologies is a vital strategy for any organization looking to enhance efficiency, quality, and overall performance. As we’ve explored, techniques such as Root Cause Analysis, Toyota Kata Coaching, 3Ms (Muda, Muri, and Mura), Kaizen, Value Stream Mapping, A3, Poka-Yoke, Bottleneck Analysis, and the 5S Method each offer unique benefits that contribute to a robust continuous improvement culture.
By following a structured approach that includes assessing the current state, prioritizing areas for improvement, selecting appropriate tools and techniques, creating an implementation plan, and continuously monitoring and adapting, you can embed continuous improvement into the fabric of your organization.
These practices not only address and eliminate inefficiencies but also foster a culture of proactive problem-solving and continuous learning. Involving employees at all levels in these efforts boosts engagement, innovation, and morale, leading to sustained improvements and operational excellence.
Remember, continuous improvement is not a one-time event but a journey. It requires commitment, collaboration, and a mindset geared toward perpetual growth and development. By implementing these tools and maintaining a relentless focus on improvement, your organization can stay competitive, adaptable, and prepared for the challenges and opportunities that lie ahead.
FAQs
1. What is the primary goal of continuous improvement?
Continuous improvement aims to enhance processes, products, or services by making incremental, systematic changes. The primary goal is to increase efficiency, quality, and customer satisfaction continuously.
2. How do you prioritize areas for improvement?
Prioritizing areas for improvement involves evaluating the impact of potential changes on overall performance, cost implications, and the frequency of issues. Focus on areas that offer the most significant benefits once improved.
3. Why is employee involvement crucial in continuous improvement?
Employee involvement is crucial because employees are often closest to the processes and may have the best insights into inefficiencies and potential solutions. Their engagement ensures better implementation and fosters a culture of continuous improvement.
4. How often should continuous improvement methods be reviewed?
Continuous improvement methods should be reviewed regularly, with periodic evaluations to assess effectiveness and adapt strategies as needed. This could be quarterly, semi-annually, or annually depending on the organization’s needs.
5. Can continuous improvement tools be used in non-manufacturing settings?
Yes, continuous improvement tools can be applied across various industries, including healthcare, services, logistics, and office environments. The principles of optimizing processes, reducing waste, and enhancing quality are universally beneficial.
6. What is the most effective continuous improvement tool?
There isn’t a one-size-fits-all answer to this question, as the effectiveness of continuous improvement tools can vary depending on the specific needs and context of an organization. However, some commonly used and highly effective tools include Kaizen for its focus on incremental improvements, Value Stream Mapping (VSM) for visualizing and optimizing workflows, and A3 for structured problem-solving. The key is to choose a tool that aligns with your business goals and challenges.
7. Can continuous improvement tools be combined?
Absolutely! In fact, many organizations find the best results by combining multiple continuous improvement tools. For instance, you can use 5S to organize the workplace, followed by Kaizen to make incremental improvements, and use Poka-Yoke to implement error prevention strategies. Combining tools helps address various aspects of process improvement comprehensively, ensuring holistic growth and efficiency.
8. How often should continuous improvement tools be used?
Continuous improvement is an ongoing process. The frequency of using these tools depends on the nature of your business and the specific processes involved. Generally, it’s good practice to:
- Regularly monitor and assess processes (monthly or quarterly).
- Conduct periodic reviews and audits (semi-annually or annually).
- Implement continuous improvement strategies as part of daily routines and culture.
The aim is to consistently seek and implement improvements without letting complacency set in.
9. What is the role of leadership in continuous improvement?
Leadership plays a pivotal role in continuous improvement by:
- Setting the Vision:
- Leaders define the vision for continuous improvement and align it with the organization’s strategic goals.
- Fostering a Culture:
- They create and nurture a culture that values and encourages continuous improvement. This includes rewarding innovation and improvement efforts.
- Providing Resources:
- Leaders ensure that the necessary resources, training, and tools are available to teams working on improvement projects.
- Removing Barriers:
- They actively work to remove obstacles that hinder improvement efforts and support teams through challenges.
- Leading by Example:
- Leaders demonstrate commitment to continuous improvement through their actions, inspiring employees to follow suit.
10. How can technology aid in continuous improvement?
Technology can significantly enhance continuous improvement efforts by:
- Automation:
- Streamlining repetitive tasks, reducing the potential for human error, and freeing up time for more strategic activities.
- Data Collection and Analysis:
- Advanced analytics and data collection tools provide insights into process performance, helping identify areas for improvement more accurately.
- Collaboration Tools:
- Software platforms can facilitate better communication and collaboration among teams, making it easier to share ideas and work on improvement projects collectively.
- Monitoring and Reporting:
- Real-time monitoring tools and dashboards enable continuous tracking of performance metrics, ensuring timely interventions and adjustments.
- Training and Development:
- E-learning platforms and digital training resources can support ongoing skills development, ensuring employees are equipped with the knowledge to drive improvements.
By leveraging these technological solutions, organizations can accelerate their continuous improvement initiatives and achieve more significant, sustained results.