Table of Contents
Conducting effective Process Improvement is not as simple as drawing out a process map to discuss. It is not as simple as collectively discussing which parts of the process you think are not working, and ad hoc trying to think about solutions to the very problems you have identified. There is a lot more to process improvement than that, and indeed it is a process in itself.
One of the central parts of the overall process improvement process is the process improvement workshop. These workshops form the basis of much of the work you will do as part of your process improvement efforts. Whether you are mapping out your process, discussing problems, assessing your options, conducting your process analysis, a process improvement workshop has many aims. They can also be used to gain knowledge, insight and understanding that may not have been there at the start.
So how do you go about deploying an effective process improvement workshop, guaranteed to get you your stated outcomes? Let’s explore.
What is a process improvement workshop?
A workshop of this kind is defined as follows:
“A group meeting or effort where the sole purpose of the session is to leave with the a plan of how to deliver a new, improved process, more capable, stable and efficient than the current state process”.
The workshop will be about brining together the right people, those who have a working knowledge of the process and any problems or issues associated with said process. These people will use the workshop as an open forum to map out the process, discuss the issues and bottlenecks faced and brainstorm the best way forward to address any of these challenges and lean out the process.
We refer to this session as a workshop as we are actively working through an end to end process, mapping, discussing, analysing and brainstorming, therefore it is a very interactive and hands on activity. This is an effort that cannot simply be done through a quick chat or use of a tool, we need to work through not only the current state process but also think about what the next iteration of this process could look like.
To aid in this endeavour, you can use an array of process improvement / mapping tools or approaches to structure your workshop and get the best out of it. To do so, you will need to be clear on the purpose of the workshop, the structure of the workshop and your own company needs.
Benefits of a process improvement workshop
Packaging this work up into a workshop format has its reasons, and the majority of these could be defined as being “benefits”. These benefits would include:
- The exchanging of ideas openly and collectively. This harbours a culture of collaboration and transparency, and ensure people feel as though they are being taken on the process improvement journey.
- Ideas can spur ideas. By avoiding conducting this work in silo, people’s creativity will be sparked and hearing the ideas of other people will give them inspiration they may not have received conducting this work alone.
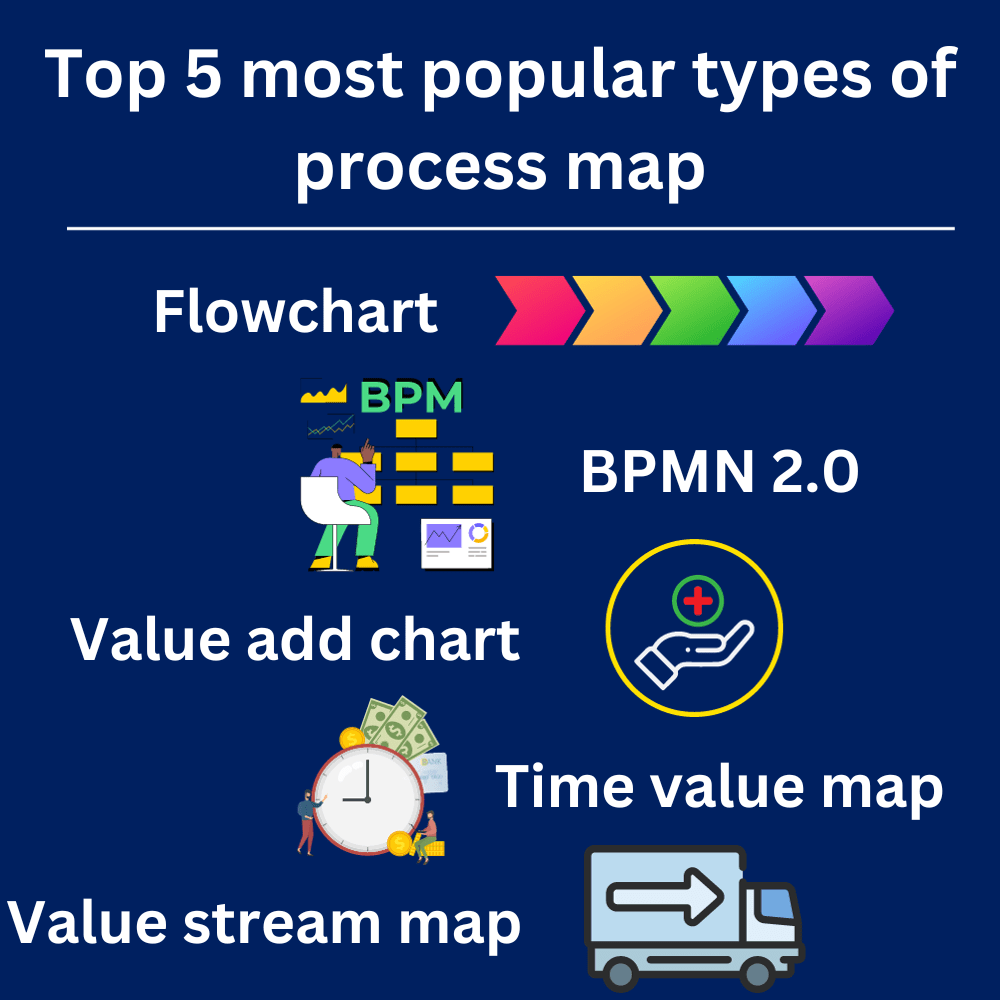
- This format makes it easier to focus on a process improvement approach. In these settings, having a specific approach (such as mapping in Flowchart format, agreeing to a value add map which needs to include timings, costs etc.) can really enrich the approach. It focuses the minds on one specific approach and stated outcome.
- No crossed wires. Sometimes in these situations the messaging around what needs to be done, what the activity is and the aim of such work can get confused. By having everyone in the same room, receiving the same messaging at the same time removes this risk almost entirely.
- A lot of work can be done in a short amount of time. For the reasons just laid out, asking several individuals to do this work in silo for it to be collated and analysed later will take a lot of time. By having everyone in one room over a 1 – 3 hour workshop, a lot time can be saved across this process.
In essence, the main benefit of conducting this type of work in workshop format is collaboration. Collaboration breeds consistently, coherence and a common purpose, and when it comes to building out your current state processes and identifying the best way to shift them to better, improved future states, these are critical.
Steps to Deploy Process Improvement Workshop
Identify the process
Be clear from the get go exactly what process you are looking to focus on. This will include clearly defining the process scope in full, identifying its start and its end. To do this, you may need to have a series of conversations with those who work with or inside of the process, leadership who want to see the process reformed and analyse any data available at this point. All of these activities combined will ensure you have a well-scoped, well defined process which you can now attempt to map out and improve.
Gather the team
Next, you need to gather those people who have a vested interested in this work. Included in this team will be your SMEs (subject matter experts), those people who work the process on a regular basis and have had exposure to any problems you are looking to address. It should also include someone who has knowledge and experience of deploying a process improvement workshop (someone who has strong facilitation skills) and potentially other interested stakeholders who may feed into or receive certain outputs of the process. For these types of workshops, Managers are often excluded as their presence can stifle debate and conversation, especially among the more junior members of the team who may feel uncomfortable being completely honest about how they conduct their work and deliver the process in question.
Create & send agenda and workshop schedule
Next, you want to be clear about your expectations for the workshop. This will involve clear and concise communication between the individual organising the workshop and those who will be taking part. As part of this effort, you will need to create a detailed agenda setting out the approach to be taken, the activities to be conducted within the workshop and you expectations for any preparation the team should make ahead of time. Send the agenda round before the workshop and attach it to the meeting invite so there can be no excuse for being unprepared.
Create & send agenda and workshop schedule
As the workshop opens, run through the agenda items and structure of the workshop that has been sent around. Ask if anyone has any questions or needs anything clarifying before the workshop officially begins. You will also state the rules of the workshop regarding things like letting everyone have their say, there are no wrong answers and looking at emails / mobile devices etc. You will also run through the goals and anticipated outputs of the workshop so everyone is clear what success looks like upon closure of the workshop.
Pull out an example process map
One of the first activities you will conduct within your workshop is to map the process out, end to end. To help focus the minds of those in the room, you will want to give them insight into what the expectations are a In this instance you should:
- Pull up a template of the tool on screen. Talk through the tool. What each part of the tool means, its purpose and the outcome you would want to see for each part.
- Talk through timings. How much time do you expect the team to be mapping out the process, given what you know about it now.
- Pull up a completed example. This example would be of a completed, end to end process, using the approach you are taking for this workshop (i.e. flowchart, time value map, value stream map etc.)
The aim here is to ensure everyone feels comfortable mapping out the process in question, it reduces the need for questioning as you build out and increases the likelihood of hitting your desired output.
Identify the start and end point of the process
This activity is all about identifying the scope of the process. Even though you have defined the process before, the start and end point of that process may differ depending on the person or team involved. If you are on specific team, and your part in the process ends at “deliver report”, you may see this as the end of the entire end to end process. However, if the process continues in another department after this step, this needs to be taken into consideration. That is why it is crucial you have the right teams represented in the room at this time. What step kicks off this entire end to end process? What step is the absolute final step you need to map, ending the process completely? Knowing this will help you to avoid scope creep.
Map the process
Now you can work through the process, mapping it out in full. Here you will talk about the various steps and activities that are conducted as part of this process. You will identify the connectors that link all of these together, the hand offs and the way in which these are conducted. You will also need to identify the decision points in the process, where your team members have to make decisions and take the process down one path or another. You will identify sign offs, escalation points, the introduction and exit of the various teams, how and where the various departments get involved.
Review the process mapped
Once you have finalised the process map, take a break from the map. This will give the team members time to reflect on what has been mapped. Once the break is over, come back to the map and review in full. Run through the process, ensuring no steps, hand offs or alternative ways of conducting the activities have been missed. If available, pull out the training materials and Standard Operating Procedures (SOPs) to run through, ensuring nothing has been missed out. In our experience, this activity will generally come up with another 1 or 2 steps that have been missed off (often small like “send copy to Finance”).
Conduct a value add analysis
At this stage, you want to break the process apart. Firstly, identify which steps are adding value. These are defined as steps that either the customer would be willing to pay for, or would have a positive effect on the final output. Colour code these in green to identify that they do indeed add value. Next, identify those steps that do not add value. These are steps deemed as wasteful, not effecting the final output in any positive way and need to be reviewed. These often including things like checking, sending and sorting – these can be marked red. Then, identify those steps which are the left which don’t necessarily add value, but are required by law, governance or organizational rules. These must be kept under any circumstances and be marked amber.
Map your ideal process
Now you have identified which activities add value to your process, you can map our ideal future state process. This is the process you would want to see deployed if there were no restrictions and all waste could be removed. When you do this, you need to run through the process at the end and ensure you can get from the start point to the end point unimpeded, and that the final output will not be impacted negatively in any way.
Conduct a gap analysis
Here, we are looking to brainstorm all potential solutions that you could deploy to address any gaps between your ideal future state and your current state. This gap analysis exercise is there to enable you to ensure the actual process you deploy will be able to deliver the outputs expected of it. You will discuss the various options available to you, run through test scenarios to see if the process could adequately run with or without certain process steps. You will add previously removed process steps back in, reform currently wasteful steps into value add steps. Identify which could be automated, which must remain manual etc. All of this will be done through the lens of ensuring the process delivered at the end if reformed and improved.
Map out the future state process
Now you have thought about your current state and any solutions you could deploy to improve the process and bridge any gaps seen, you need to map out the future state process. This will be the process as it is going to be, not your ideal, but the realised actual process that you will deploy. This will include any changes identified, solutions thought of, steps added back in again after you realized you were unable to remove them. This will be the process the world sees and the team begins to follow from deployment onwards. Map out in full.
Close the workshop
To close the workshop, firstly you want to revisit what was set out in the agenda / approach section right at the start. Have you worked through that agenda and approach as anticipated? The goals and outcomes set out at the start, have they been achieved? Did people stick to the rules as expected? This activity just ensures you can wrap up your workshop successfully and feedback on the successful delivery of it. If you can confidently say all of these were indeed achieved, you should have the confidence to believe the changes you have identified for your process are indeed the right ones.
Conclusion
As you have seen from the process just laid out, delivering a successful process improvement workshop is not an ease feat. It is not as simple as mapping out the process you currently conduct and talking through it. You must ensure you are looking at your process through the lens of the current, ideal and future state. You must conduct extensive analysis of the process, through the lens f the value add and the gap analysis. You must ensure you leave the session with a changed, reformed and improved process, capable of conducting the activities quicker, more effectively, with reduced risk and better quality. This tried and tested process improvement workshop approach will work for you, just ensure you follow these steps correctly.


